Creating a Custom Dashboard
These instructions guide you through the complete process of creating a custom dashboard in EPASS Reports. You can build multiple dashboards and assign them to specific EPASS Users or Groups, ensuring that only authorized members have access. Additionally, you can set a default dashboard that automatically loads when a user logs into EPASS Reports, providing a personalized and streamlined experience.
- You need the Admin - Create Dashboard security option to create a custom dashboard. See Managing Dashboard Security for more information.
- Custom dashboards can only be created on a PC. The dashboard builder isn’t supported on tablets or mobile devices.
Adding a New Dashboard
-
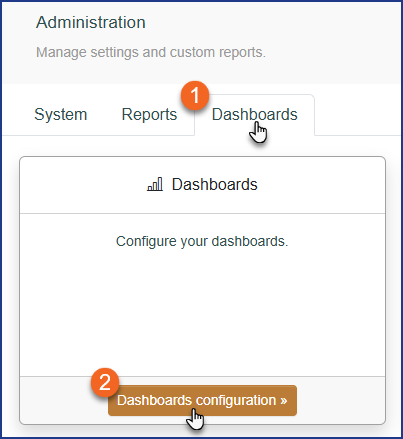
Click Admin.

-
Click the Dashboard tab, and then click Dashboards Configuration.
-
Click New. The Dashboard Editor opens.

-
Enter a name for your new dashboard and a description (optional). Click Save.

EPASS database tables that are locked for editing might prevent you from creating a new dashboard. If you are receiving an error when trying to create your dashboard, verify that other EPASS Users aren't logged in and editing EPASS table data.
Adding Widgets
-
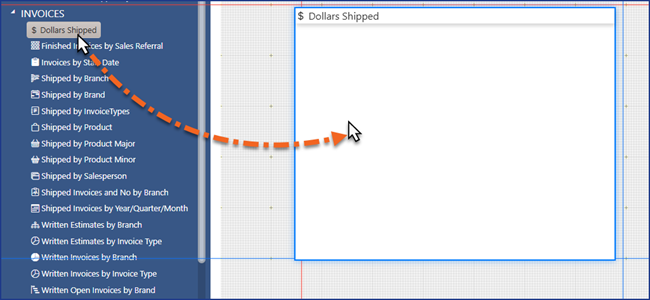
From the Widget menu on the left, drag a Widget into the dashboard.
 Tips
Tips-
Try to limit the number of Widgets on each dashboard. Because each Widget requires system resources to load, having too many can slow down the application’s overall performance.
-
You can also add a Widget to the dashboard by double-clicking its name. The Widget will automatically position itself in the first available space it finds on the dashboard.
-
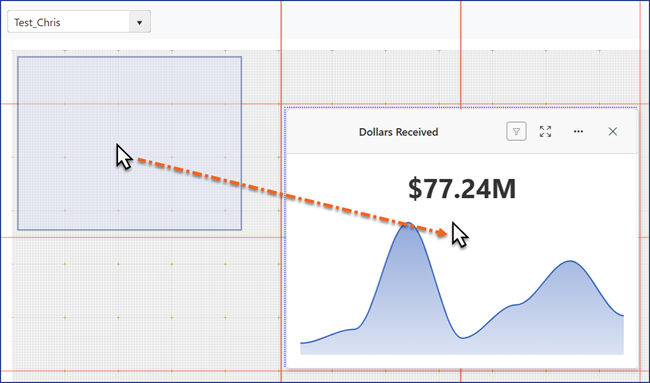
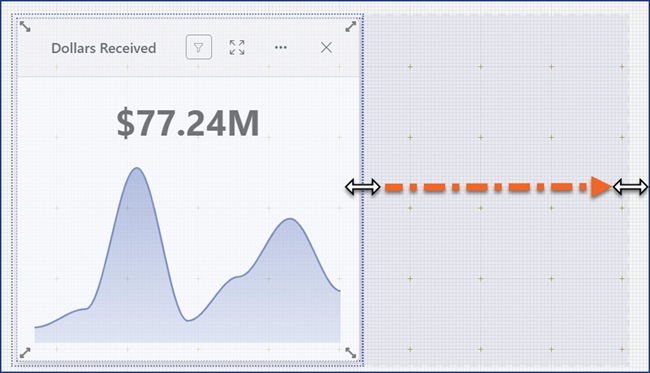
Reposition a Widget by dragging it to a new location. The Widget automatically snaps to the grid.
-
Resize a Widget by clicking and dragging one of it's edges or corners.
-
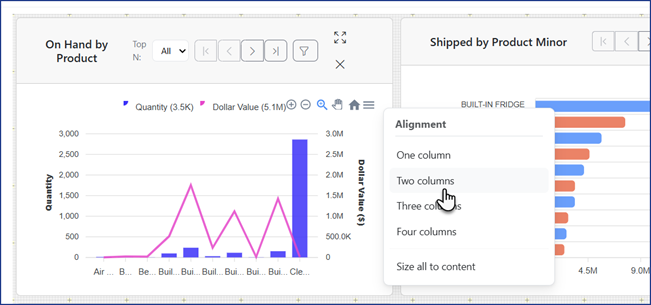
Right-click anywhere in the grid to align Widgets to one, two, three, or four columns. The Widgets automatically resize to conform to the new layout.
-
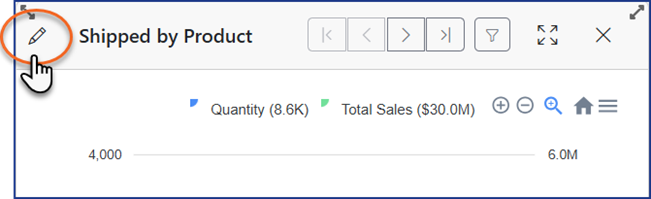
You can edit a Widget's display name by clicking the Edit button that appears next to the Widget's name.
-
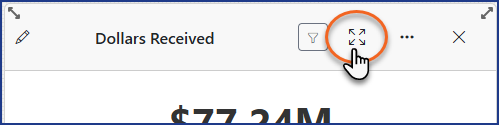
Click the Expand button to view a Widget in full-screen mode.
-
After moving or resizing your Widgets, make sure to click Save Layout!


-
-
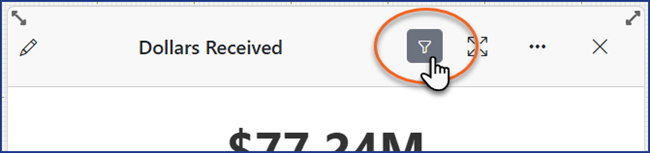
Click the Widget's Filter button.
-
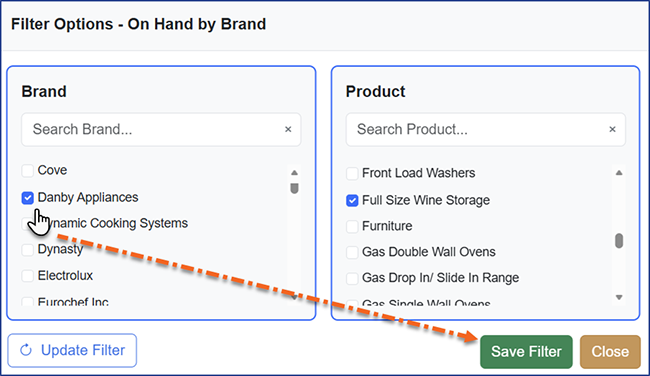
Select the report's filter options, and then click Save Filter.
 Tips
Tips-
To remove a Widget from the dashboard, click the
Xbutton.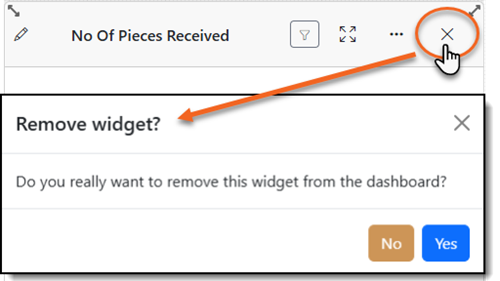
-
Clicking Update Filter refreshes the filter options. Use this to ensure that you have the most recent list of filter options.

-
-
Continue adding Widgets until you've finished building your custom dashboard.
Assigning Users or Groups to a Dashboard
When a custom dashboard is created, it is only viewable to the creator, but you can assign viewing access to additional Users or Groups.
Assigning or unassigning users requires logging back into EPASS Reports for the changes to take effect.
-
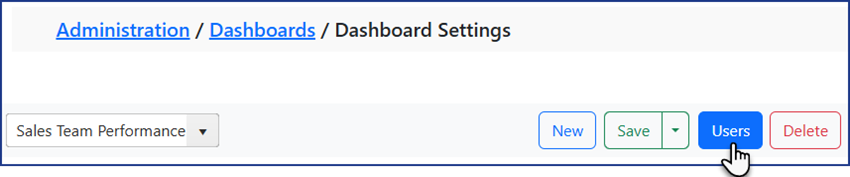
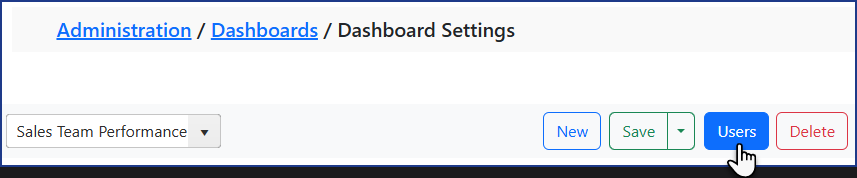
Click Users.
-
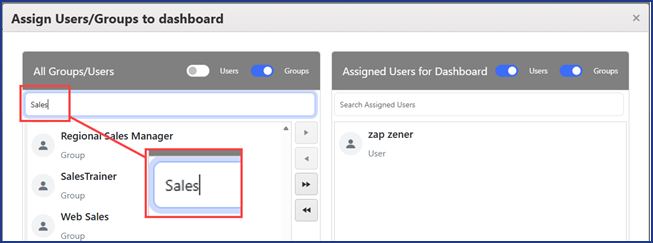
In the All Groups/Users list on the left, search for an EPASS User or Group using the search and filter options.
-
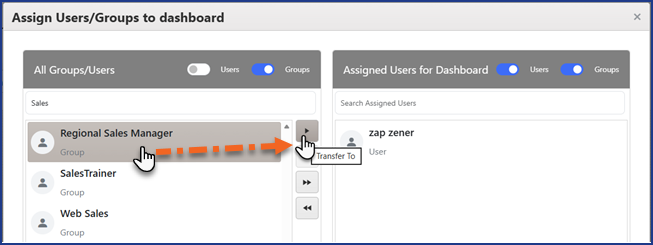
Click the User or Group, and then click the right arrow button to move them to the Assigned Users list on the right.
 Tips
Tips-
You can multi-select Users or Groups by holding CTRL while clicking.
-
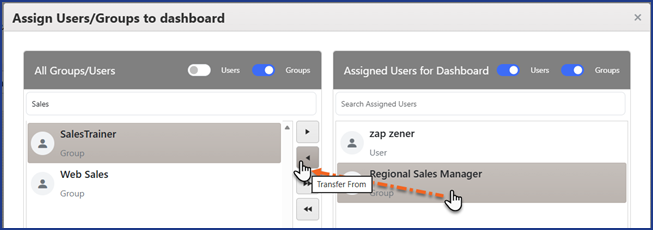
To unassign Users or Groups, select them in the Assigned Users list, and then click the left arrow button.
-
You can assign or remove all Users and Groups at the same time by clicking the Transfer All buttons.

-
You can also manage User access to dashboards through EPASS User Security options. See Managing Dashboard Security for more information.
-
-
Click Close.
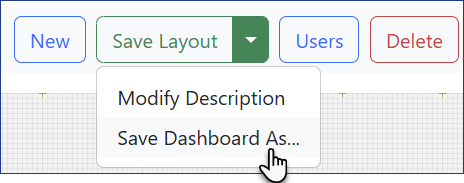
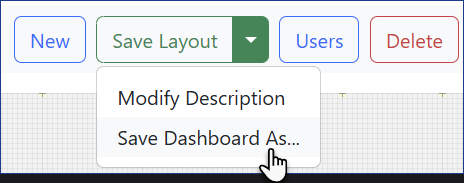
Copying a Dashboard
Follow these steps to create a copy of a dashboard.
-
Click the Save Layout dropdown, and then click Save Dashboard As.
-
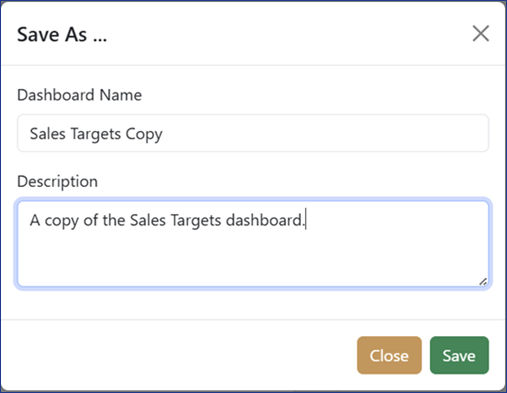
Enter a name and description (optional).
-
Click Save.
The dashboard copy is created and automatically loaded in the Dashboard Editor.
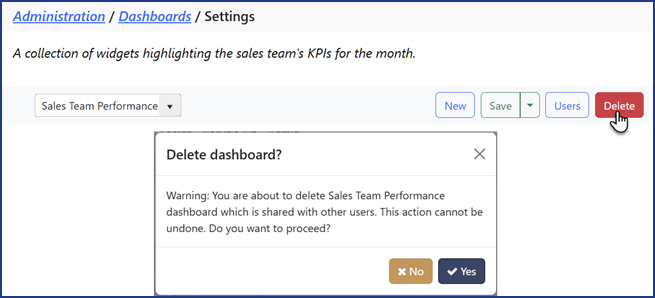
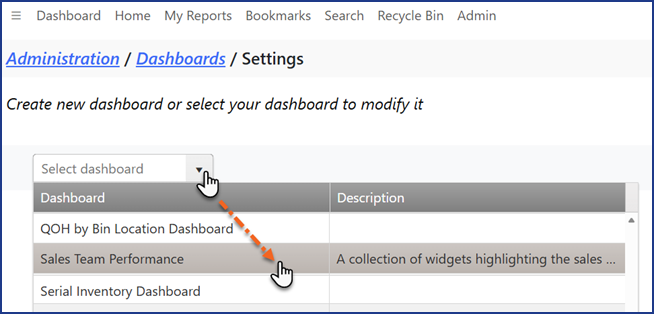
Deleting a Dashboard
Deleting a dashboard can't be undone.
-
Click Admin > Dashboard > Dashboard Configuration.
-
Select the dashboard from the dropdown list.
-
Click the Delete button, and then click Confirm.